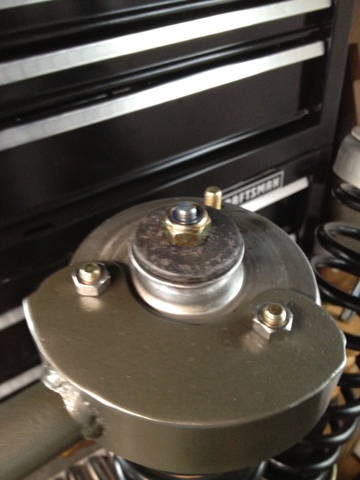
over on the bf.com forums there was a discussion happening about how to lower an e21 without compromising the suspension geometry one of the member decided to separate the front subframe, adjust the lowering points and rewelding the separated pieces back together and boxing in and strengthening the support points...here are his comments...
''So I've got a little problem with my suspension in that I couldn't get it low enough to make my low profile 13" tires look right. As low as I dropped the coilovers, it didn't make a difference as the control arms bottomed out on the subframe. So I took an inch out of the subframe. This raises the control arm mounts and steering rack 1", while leaving the engine at OE height. This will help the make the suspension/steering better too. (I may need to put a half inch spacer on the motor mounts tho, as it doesn't touch the oil pain, but I might have issues when the engine torques.) I was originally concerned with the subframe being strong enough, but after taking it out of the car, and disassembling I have no worries, as it really is a pretty lightweight piece, and just spotwelded together. When I'm done it'll be fully welded and boxed in for more strength than stock.
Put bolts into the subframe mount holes and tighted them down and welded the bolt heads to the bench and then welded a couple other braces to the subframe to keep things square.''
Then I proceeded to cut an inch out of the subframe using a sawzall and air disc cutter.
I then used a spot weld drill and drilled out the remaining brackets and ground some rust off.
I then lined things back up and welded it back together. It's welded enough to hold things in place and square, but I'm dropping it off at a place to get sandblasted, and then I'll finish welding it, and then I'll drop it off at the powdercoaters (and I'll have better pics).
Mounted in the car, you can see it'll give more clearance. 2 of the bolts will still work fine but the two longer bolts needed to be an inch shorter so I went and bought a couple new bolts.

comments included...''epic win! This is why forums can be so valuable! This would give any of us who are lowered at all better suspension geometry. Even if you're not lowered an outrageous amount you will have a better roll center, less body roll and better handling. I spent a lot of time trying to figure out how to move the control arm pivot point upward an inch and decided it wasn't worth it if I couldn't move the steering rack as well since it would make bump steer much worse. I didn't think there was a good way to do it, you figured it out. I will absolutely be doing this sometime soon.
As for the steering shaft, I've heard of GM guys getting rid of the rubber flex disc and installing spring steel plates for a crisper steering feel. doing this would cut about 1/4" out of the length of the shaft. I'll see if I can drum up some pics. Also, I have almost 1/2 to 3/4" of splined shaft that's not being used, so you could probably just slip the coller down further over the splined input shaft on the rack.
As for motor clearance, can you fill your engine mounts with poly? I need to do this as well, the stockers are too soft and the motor rocks way too much.''
the fabricator responds...''This might seem complicated, but in actuality, I've only got like 2 hours of time into it so far, so it really isn't that complex of a thing. Just a matter of angleing the sawzall just right with long sawzall blades. And of course welding / bracketing the subframe to the bench ahead of time so you don't lose the proper alignment.
I'm using that sway bar link upgrade from the FAQ's, and I do have poly in my motor mounts, although it didn't really stay very good. I might try to get some more poly today and redo them as much as possible. (I think I pulled my "mold" tape off too soon and didn't let the poly harden up enough).
Although the steering rack has moved vertically up 1", the steering shaft is at an angle so the length that that changes is less than an inch. I haven't figured out exactly how much that is, and planned to just tackle it when I got to it.
When I was doing my brake master replacement work, I buggered up my steering shaft a bit, so it is less than pretty, so I wouldn't mind getting another one.


another member responded...However, if getting the car to sit a bit lower was the intended result, I think you may end up dissapointed on that front. The ride height shouldn't be affected by relocating the subframe, it will however greatly improve your roll center on a lowered car.
other members continued the conversation with...''This is such an improvement for suspension geometry in every way. My car i
sn't even super agressively low, but I'm sure I've bottomed out the control arms and the control arms are parallel with the ground. This means camber decrease (very slightly) as suspension compresses, poor roll center which means more body roll, etc.
raising the control arm pivot point restores geometry to offer camber gain as suspension compresses, better roll center, and it even changes the angle of the sway bar (ie double acting as a radius rod or tension rod for us) to improve brake dive.''
above..is an example of how body roll can flex the suspension or when a car is extensively lowered or lowered and driven aggressively this is where a bottomed out control arm hits the subframe...
this is the result of the raised subframe allowing the control arm greater swing...
a member objected to the design with these comments...''DISCLAIMER: I may not be getting what's going on, but I did some math and drafting so I'm looking for criticism, or anyone who can clear up my possible misunderstanding.
I don't think this will lower your car, nor do I think it will lower your roll center. In fact it should leave your car at the same height, and raise your roll center.
Point 1. In a car with MacPherson Struts the car is "suspended" on the damper/spring system. The lower control arm has nothing to do with supporting the car, only locating the wheel during bump and droop.
Point 2. Therefore when you cut your subframe 1" you are moving the lower control arm chassis mount up 1" in relationship to the tire contact patch at the road surface.
The following is a drafting of the MacPherson Strut Roll Center calculation where you raise the control arm chassis mount 2" (to show exagerated effect). Not only does the roll center go up but because the length of the controll arm is static you have now tucked your front wheels into positive camber (you can't really see this in the resolution of the drafting but if you look at the two large circles at the top you get the point that if the lower arm chassis point moves up it must cause the whole upright system to rotate around the axis of the upper MacPherson strut mount and therefore move in towards the center of the chassis).
The dark dot is the Roll Center
I highly recomend reading Allan Staniforth's book "
Competition Car Suspension" before doing any major suspension work on any car. Even if you don't follow the axiom that Roll Center location is the be all end all of suspension design, he still gives you a number of methods for desigining suspensions and modeling them.''
it continued with...''I think the problem with e21's is that that control arm on lowered cars sits about parallel to the ground. When the car corners, the outside wheel will rise in relation to the body causing the control arm to move beyond parallel (higher on the strut side than the chassis-mount side). All kinds of funk is supposed to happen when the control arm gets like that. This mod would eliminate that and bring the control arm movement closer in line with that of a stock e21. Well, that's how I understand it anyway.''
the poster replied...''That's an interesting point Adam. It can certainly cause a problem in a double wishbone system if during bump or droop you get to a point where the control arms don't actually converge in the imaginary "vanishing point".
I'll measure where the chassis pickups and strut mount actually are, then do some variations for lowered/raised, and introduced negative camber and see what happens. I should have some draftings up later this week if I can get measurements off my 320i.
Anyone want to give me a balpark lowest lowered position with coilovers? I am going to have to make an arm that locates to the strut mount so that I can get a vertical measurement off of it (like a giant caliper) but I'd be interested in how much the car can be lowered. I'll then draft in increments that make sense.
If anyone uses AutoCAD or the like I can post dwg or dxf files when I am done so you can run different suspension options through and see where you end up.
This might seem complicated, but in actuality, I've only got like 2 hours of time into it so far, so it really isn't that complex of a thing. Just a matter of angleing the sawzall just right with long sawzall blades. And of course welding / bracketing the subframe to the bench ahead of time so you don't lose the proper alignment.
I'm using that
sway bar link upgrade from the FAQ's, and I do have poly in my motor mounts, although it didn't really stay very good. I might try to get some more poly today and redo them as much as possible. (I think I pulled my "mold" tape off too soon and didn't let the poly harden up enough).
Although the steering rack has moved vertically up 1", the steering shaft is at an angle so the length that that changes is less than an inch. I haven't figured out exactly how much that is, and planned to just tackle it when I got to it.
When I was doing my brake master replacement work, I buggered up my steering shaft a bit, so it is less than pretty, so I wouldn't mind getting another one.
Charbel, how much for yours?
Quote:
Originally Posted by jrcook320  As for the steering shaft, I've heard of GM guys getting rid of the rubber flex disc and installing spring steel plates for a crisper steering feel. doing this would cut about 1/4" out of the length of the shaft. I'll see if I can drum up some pics. Also, I have almost 1/2 to 3/4" of splined shaft that's not being used, so you could probably just slip the coller down further over the splined input shaft on the rack. |
Another option is one of these like from Afco or another company. I've also got one from a VW lying out back in my shop. They use a U-Joint as well.

Source -
http://forums.bimmerforums.com/forum/showthread.php?t=1253615